This assignment is super easy and super short.
Part 0. Signing Up for Piazza
Good news! If you were registered for this course before 11:59pm on Sunday June 21st, you’re already registered! Visit Piazza by clicking on the Piazza menu item on Canvas. Follow the instructions on the “Introduce Yourself” post!
If you were not enrolled, I will do another round of enrollments on Monday at 12pm Central Standard Time and 5pm Central Standard Time.
Part 1. Installing DrRacket
Now we need to get DrRacket (and the Racket programming language) installed on your computer.
Download the Installer
- Go to the Racket download page. You’ll be downloading the latest version that’s available (auto selected) even though in some of my screenshots other versions are shown.
- Pick the installer that corresponds to your computer’s OS.
What's 32-bit vs 64-bit?
You can select either 32-bit or 64-bit, but if your computer is less than 4 years old, you should go ahead and pick 64-bit. What does this mean you might ask? You'll learn more about this in future CS coursework, but the basic idea is that computers have memory (called RAM) where they store temporarily store information as they run applications. Programs are assigned specific "blocks" of memory using addresses, just you were assigned a specific room in a residence hall on campus. 32-Bit programs can use up to 2^32 different memory addresses (around 4GB of RAM) while 64-bit programs can use up to 2^64 different memory addresses (17,179,869,184 GB (16 exabytes) of RAM).What's Apple Silicon?
If you're on a Mac laptop that was made anytime after November 2020, you should select the "Apple Silicon" version. However, the "Intel" version will work on your computer regardless. In November 2020, Apple switched from using Intel Processors that use the x86 architecture to Apple Silicon processors that use the ARM architecture. The exact difference between these two approaches to computing is beyond the scope of 111, but in COMP_SCI 213 you'll start to tackle these ideas!Install DrRacket + Racket
Once you’ve downloaded the installer, you’ll need to actually run it. On a Mac, you’ll drag the RACKET folder into your APPLICATIONS folder. On a Windows PC, you’ll run the exe file to install it.
Error: "Windows protected your PC"
You may see the below error if you're installing on a Windows computer with Windows Defender in its default state.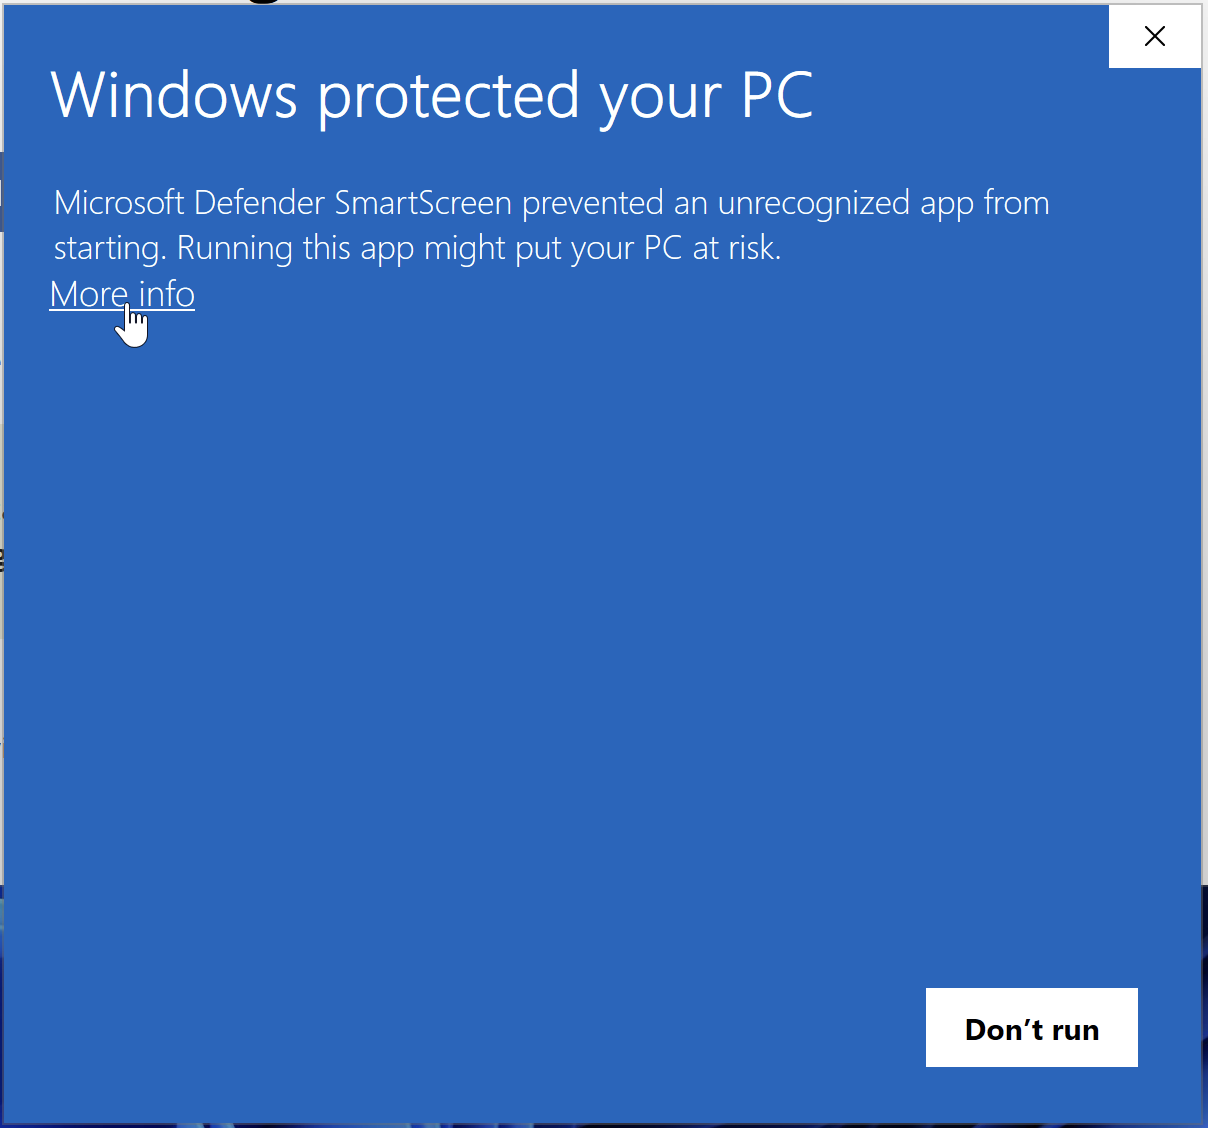
Windows by default protects users from installing "unknown" software on their computers. When a user tries to install a program it doesn't recognize, it "phones home" to Microsoft and asks if this is a common installation that people do. If it gets the response "No" you see this message. You can go around it pretty easily.
- Press the text that says More info.
- Press the Run anyway button.
- Continue the installation as normal.
[Optional / Advanced] Command Line Install
If you're a Mac or Linux user, you can also install the latest version of Racket (v8.14 as of August 2024) via the command line.On a Mac with Homebrew installed:
brew install --cask racket On a Linux system with
apt-get configured: apt-get install racket Part 2. Setting Up
After installation, you should be able to double click on the DrRacket executable/application  to start DrRacket. On a Windows PC, it should be in your Start menu (or whatever they’re calling it these days). On a Mac, it’ll be in your Applications folder.
Screenshot of the open Window (and what to do if you don't see it)
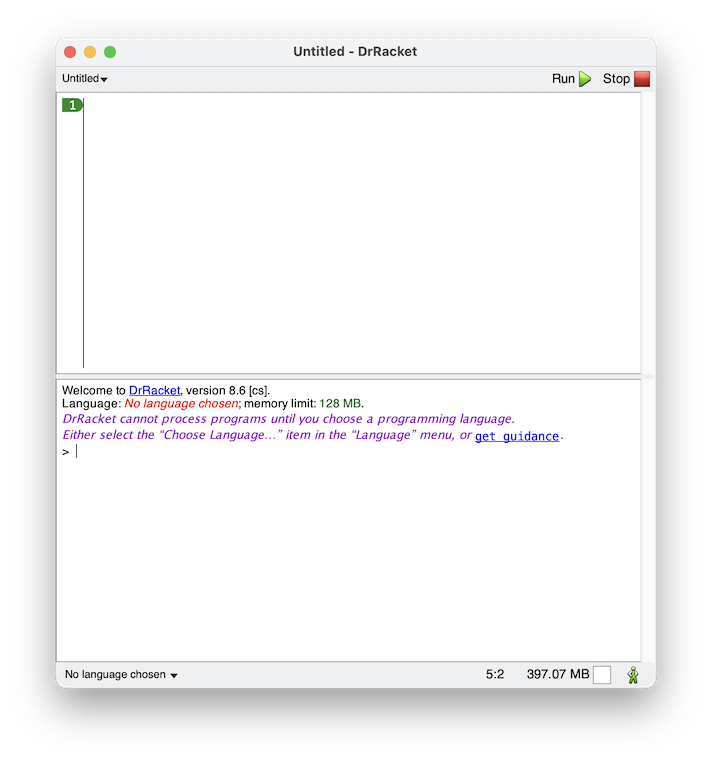
If you don't see this window appear and you're on a Windows machine, you likely saw a blank window appear. That's because you opened the
Racket executable rather than DrRacket. Go back to your Racket folder and open DrRacket (not Racket). Why Racket + DrRacket?
One of the main reasons we use Racket in this class is that it is essentially a programming language for programming languages. Rather than being a single programming language (e.g. Python), it allows you to implement your own languages and allows us to focus on the idea of learning programming languages rather than learning one specific language. In this class, we'll actually be gradually progressing from one language to another as we practice our programming skills and DrRacket was specifically designed to help students learn to progress between different language features.Now that DrRacket and Racket are installed and ready to go, we need to do a couple of things:
-
To begin with, we need to tell DrRacket which programming language we intend to use. Select the Language menu –> Choose Language… and choose the option The Racket Language. Hit OK to save your selection. This tells DrRacket that we’ll be specifying what language we’re working in via the first line of each program we write.
-
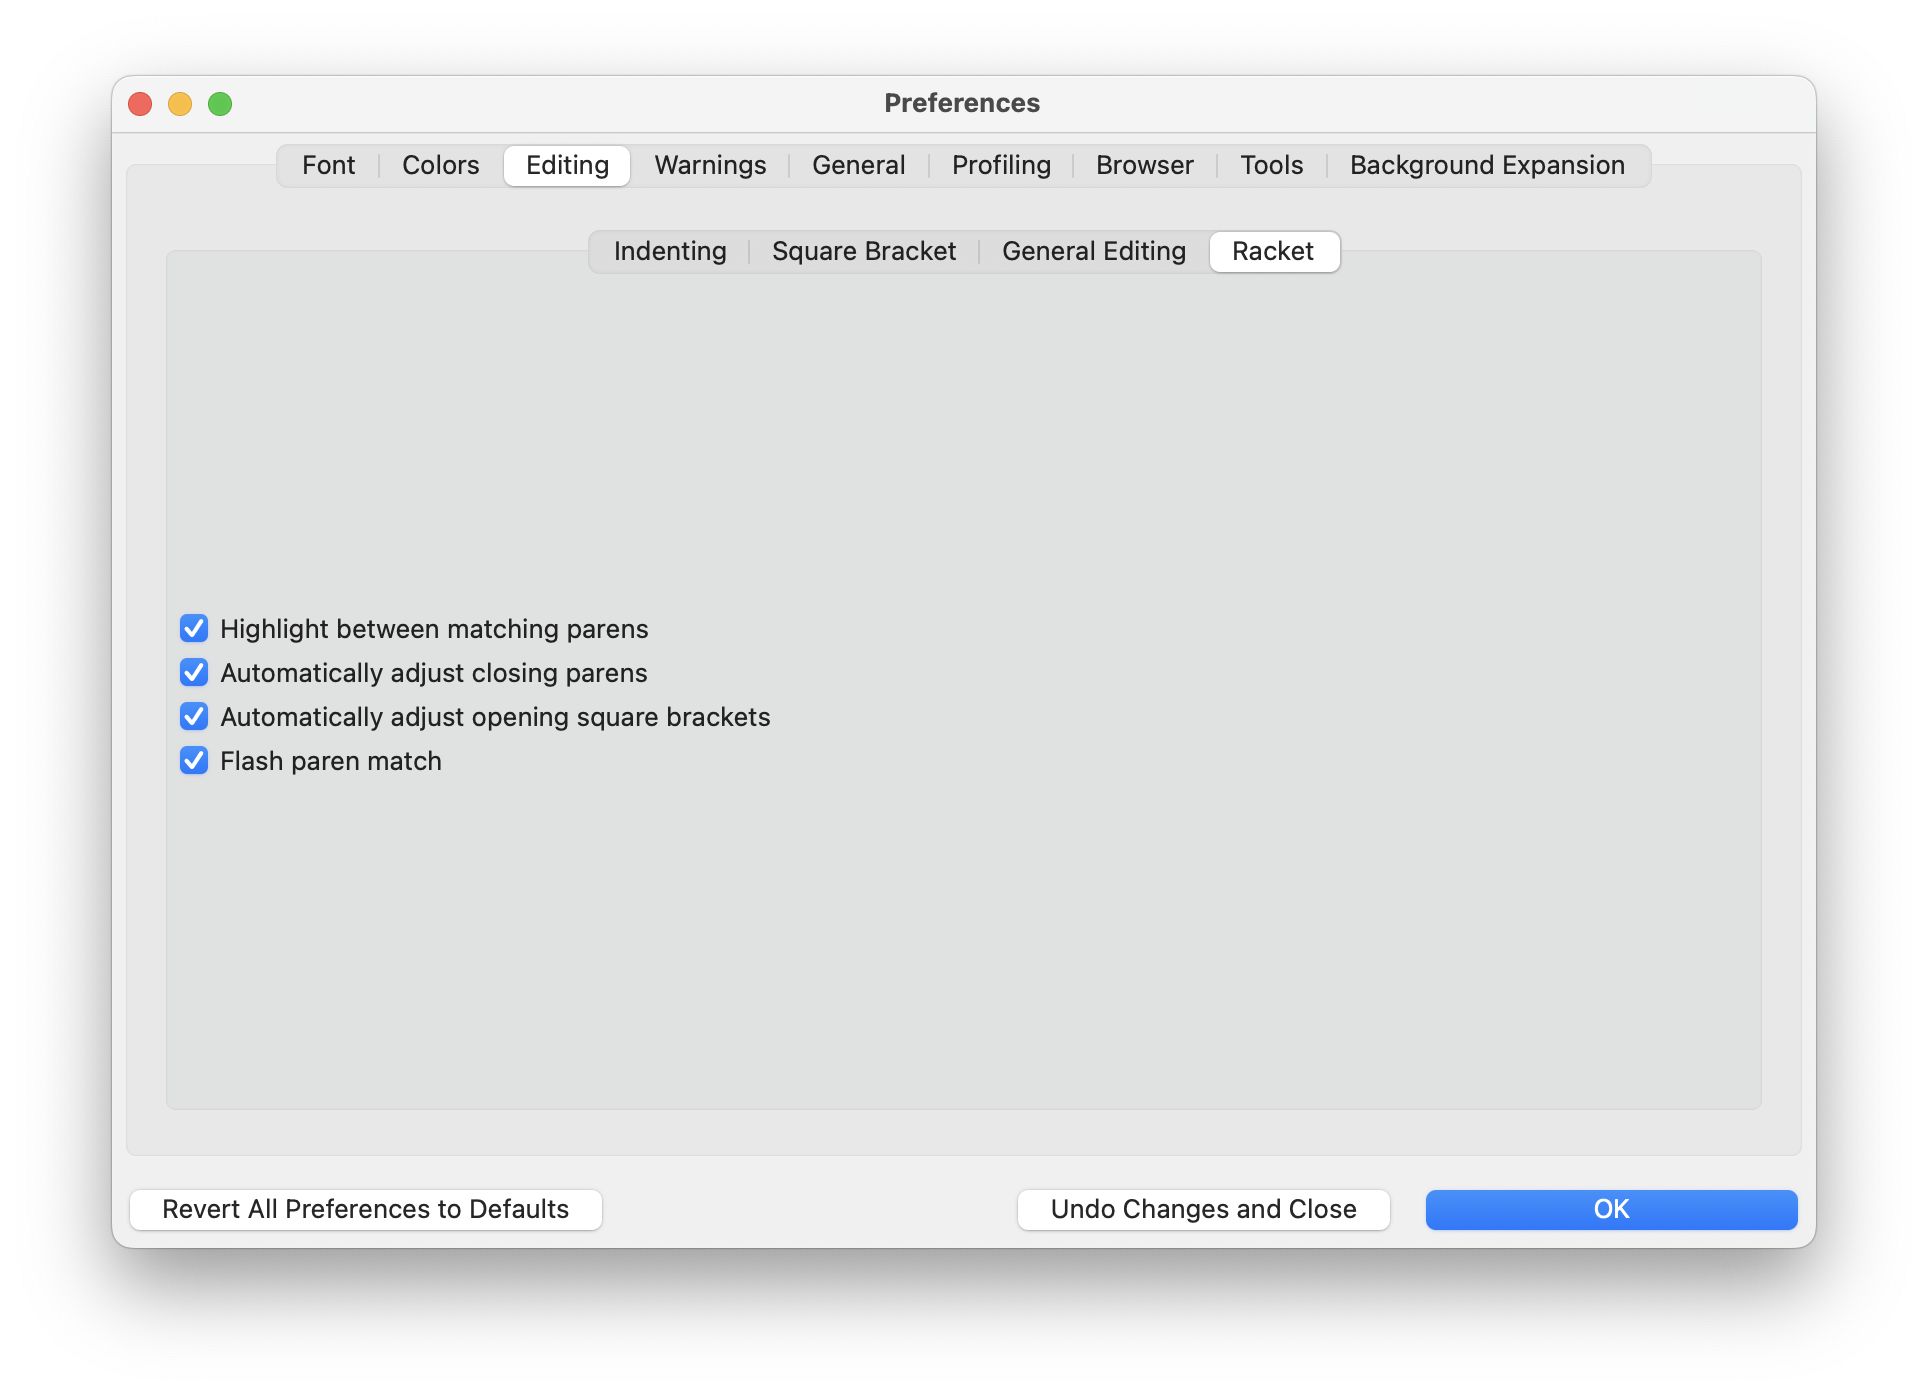
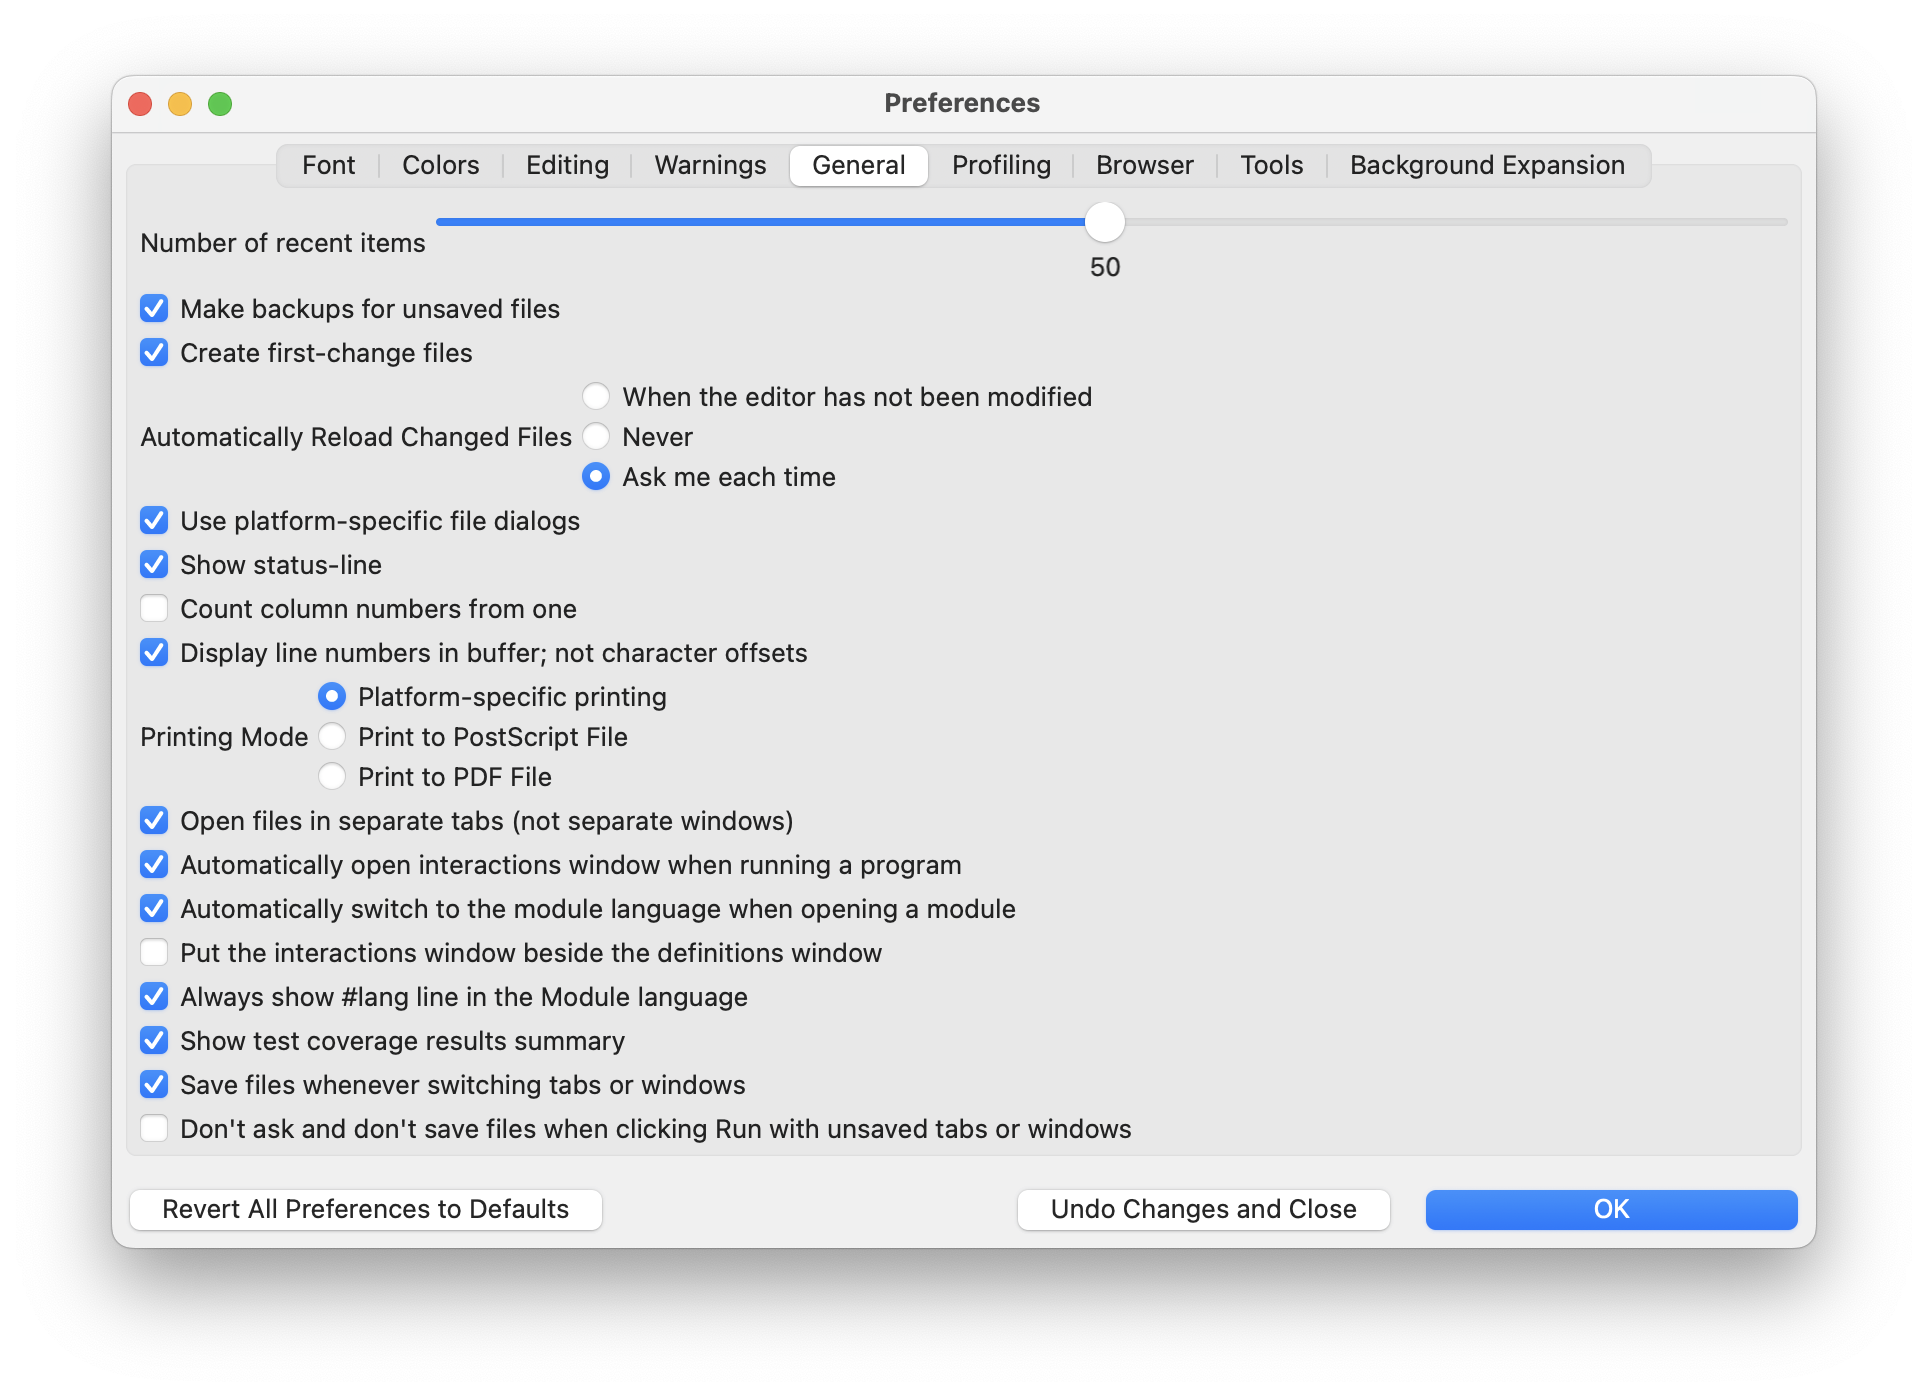
Now to configure some DrRacket editor features. Open the Preferences menu (on a Mac, first click on the Dr Racket menu then hit Settings)… a. In the Editing tab, choose Racket. Check all four items here. b. Switch to the General tab. i. Check the option Save files whenever switching tabs or windows.
Why though?
The Editing options make it easier to program with parentheses. With these options, you only need the “[” and “]” keys when typing the parenthesis and DrRacket will automatically adjust the characters to be(, [ or the matching ) and ] parenthesis as appropriate. The General Options will help you avoid submitting unsaved work by proactively saving it for you.
Screenshot Walkthrough
First, the Language Selection!

Then some Editing settings...
Finally the General settings...
Part 3. Selecting our First Language
One of the core tenets of this class is that there is no such thing as a little program. All programs, regardless of their size/length, are powerful in that you have successfully translated an idea from your head to a form that the computer understands. So now, let’s write a POWERFUL program!
The Definitions Window is the top half of the DrRacket app and is where we write our programs. First, we need to tell DrRacket which language we want to use. At the top of the Definitions Window, copy and paste the below line:
#lang htdp/isl+
This tells DrRacket to load the Intermediate Student Language with Lambda, the first programming language we’ll use in this class. Once you’ve selected the language, hit the  button at the top of the Window which asks Racket to load the selected language. If everything went well, in the Interactions Window you’ll see a line that says
 Language: htdp/isl+, with debugging; memory limit: 256 MB. (note: the memory limit might be different on your computer).
Part 4. Writing a Program
Now, we want to write a program! In other words, ask the computer to perform some action with some inputs. We do this with humans all the time:
> Hey what is two plus three?
> Five; no cap.
Human language is often ambiguous and up for interpretation across sociocultural millieus. Computer languages on the other hand must be completely unambiguous and interpreted the same way by many autonomous agents. In the above example, we’ve got a simple action that we’ve asked an agent to perform: add together two numbers and report back the result. But you can imagine asking this in A LOT of different ways and having many different humans still perform the same action.
ISL+ only understands requests written in a very specific syntax:
(action-name input-1 input-2 ...)
Let’s break this down into parts:
- The open (or left) parenthesis “
(” says “please perform…” - Then immediately following is the
action-name(in CS we call actions functions just like in math class) - We terminate the name of the action with a space “
- Then we give it sensible inputs, in this case
2and3separated by spaces. - We indicate the end of the request via a close (or right) parenthesis “
)”.
In the Definitions Window type the following below the earlier line that specified the programming langauge:
(+ 2 3)
Now hit RUN. You should see the calculated result now at the bottom in the Interactions Window. If you see a result of 5, congratulations! You’ve officially run your first program.
Screenshot of Result
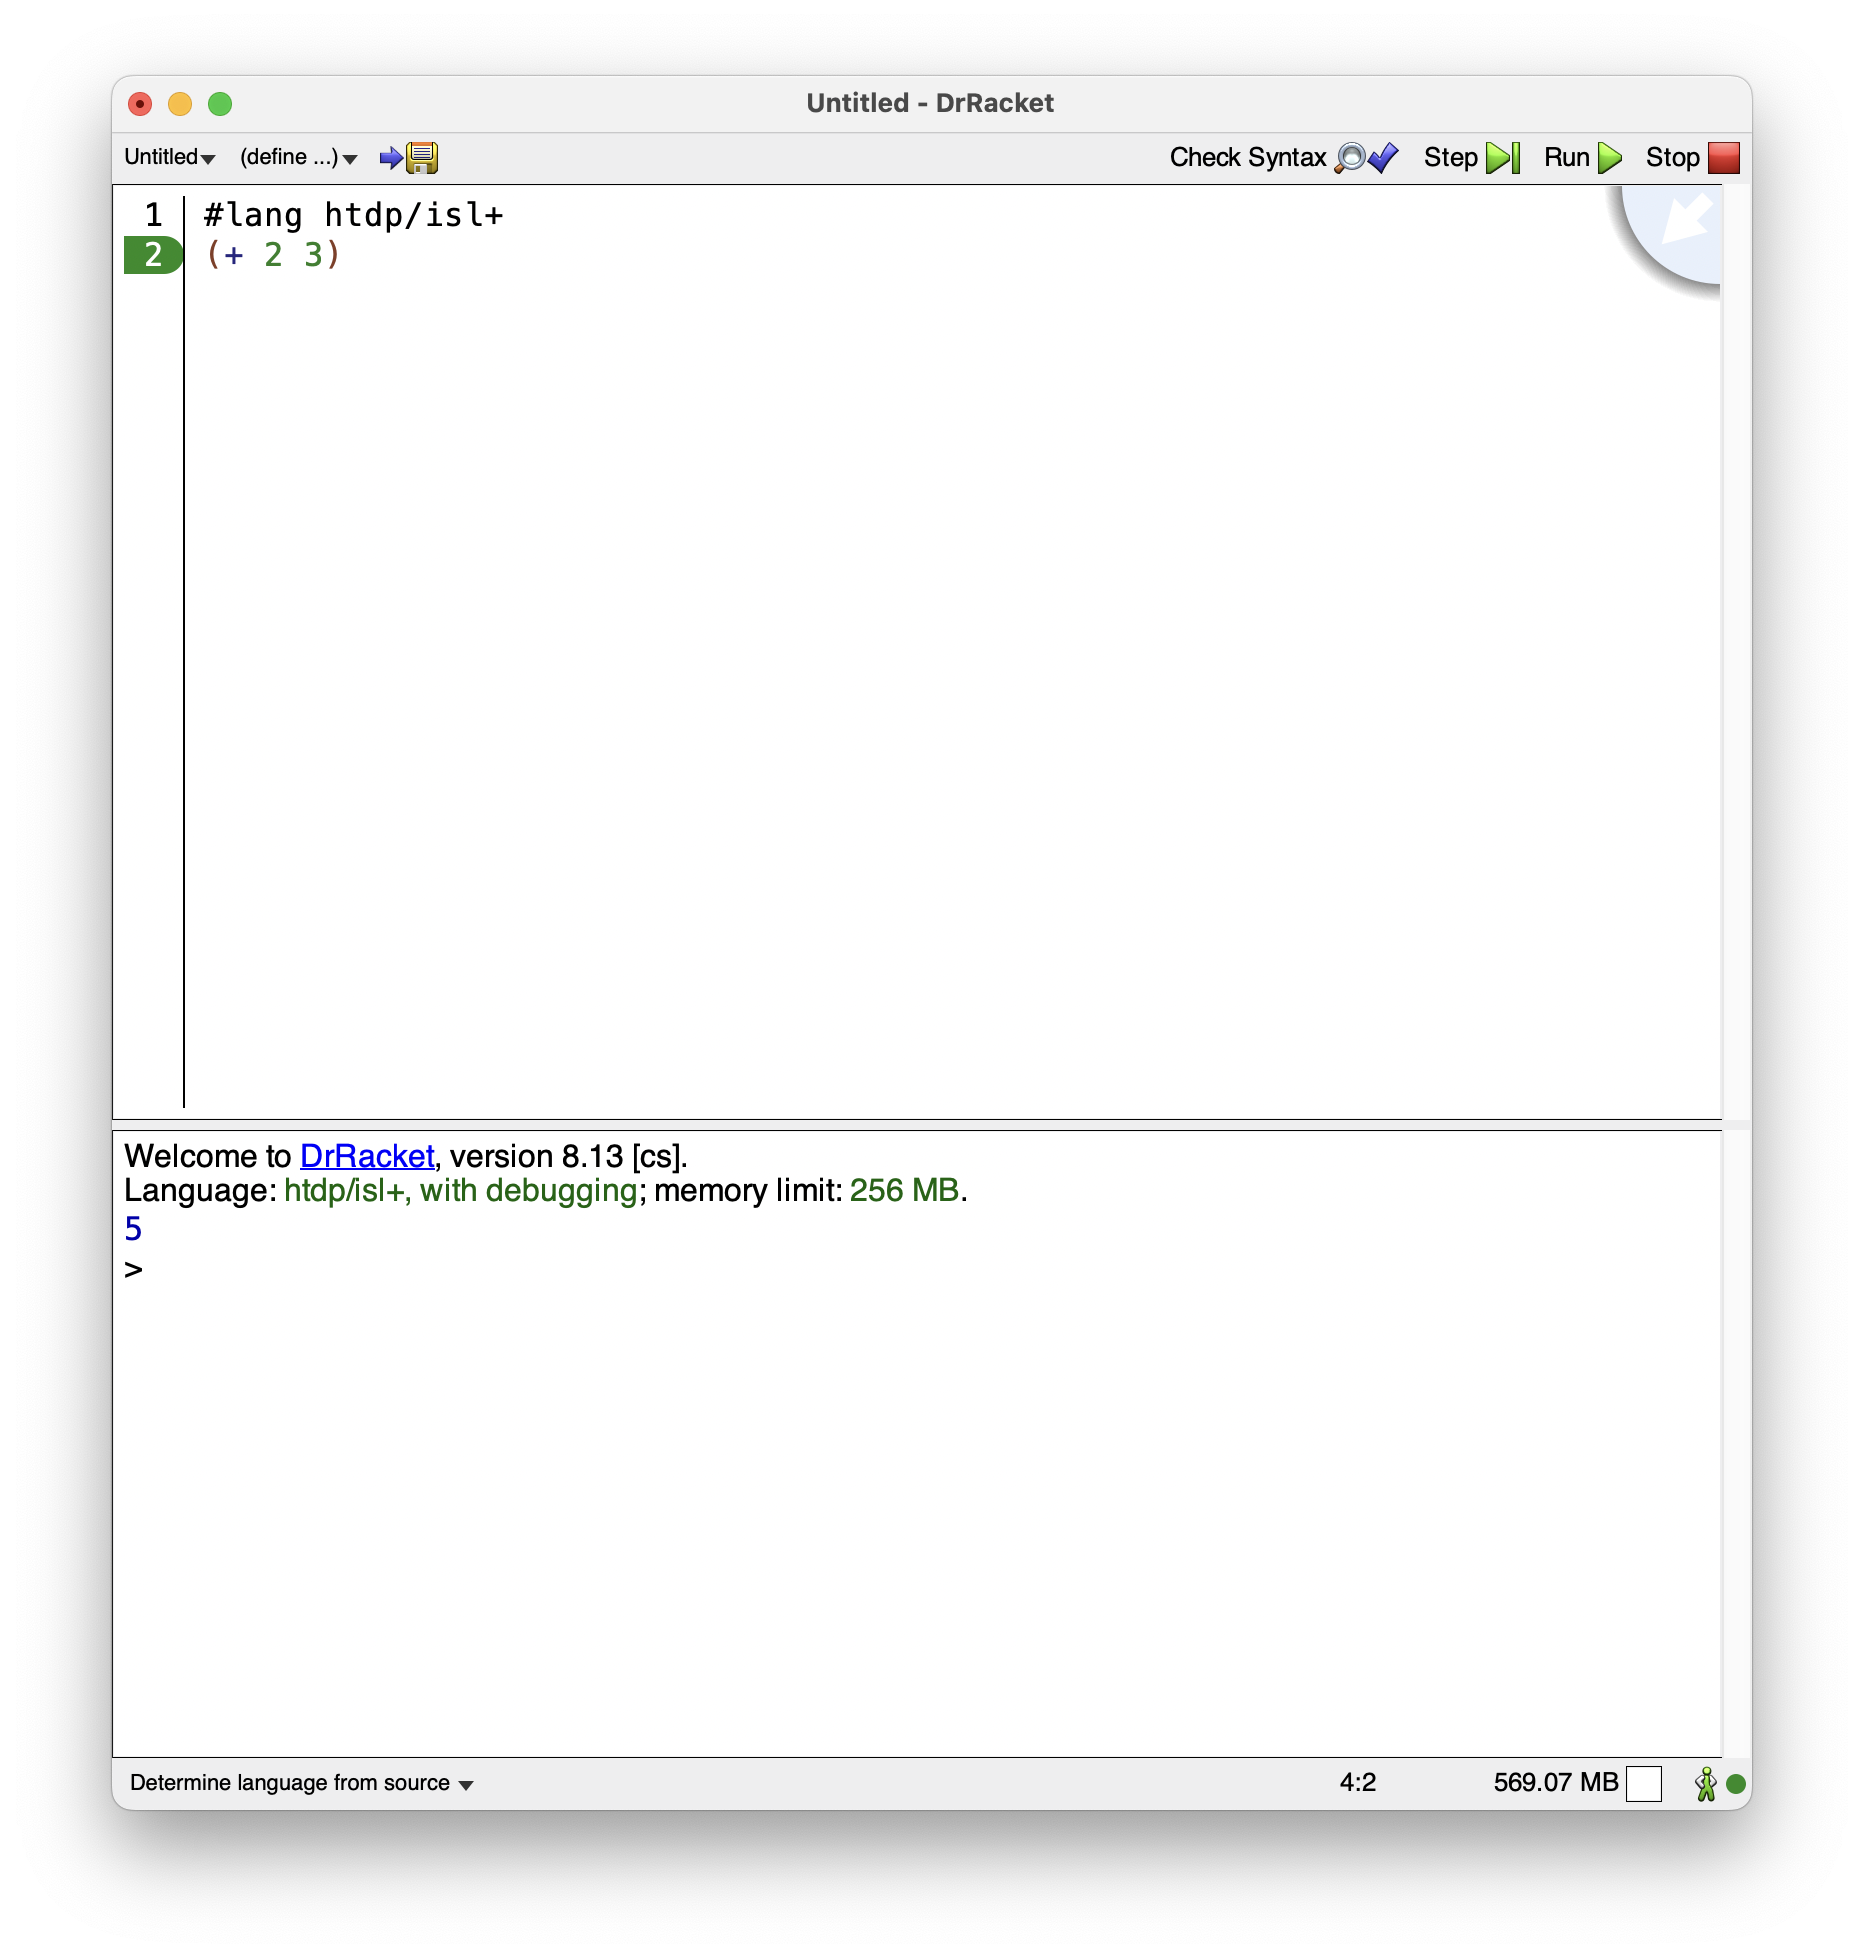
Note: Never turn in code that you have not tried to RUN! Anytime you add something to your program, you should try running it. Programming is a process of translating what you have in your brain into a form the computer understands. You should be constantly checking to see if that translation process is proceeding as you think it is.
Part 5. Writing a Definition
While (+ 2 3) is a pretty dope program, sometimes we need to teach the computer to remember a particular piece of data to be used later in our programs. We can teach the computer to remember pieces of data using a define special form. Add to your program in the Definitions Window a new line that looks like the following:
(define netid "abc1234")
Make sure to replace the thing in quotation marks with your actual NetID. This tells Racket that from now on, when you give it the symbol netid it will use the value "abc1234".
Do capitals matter?
YES! ISL+ (and most other programming languages) are case-sensitive meaning something calledslay and something called sLaY are considered separate and unique objects. Are the quotes important?
YES! Both sets of quotation marks" are important! They tell Racket that this thing inside the quotation marks isn't just a symbol, it's a piece of data called a string (that's why DrRacket makes it green). What should my final program look like?
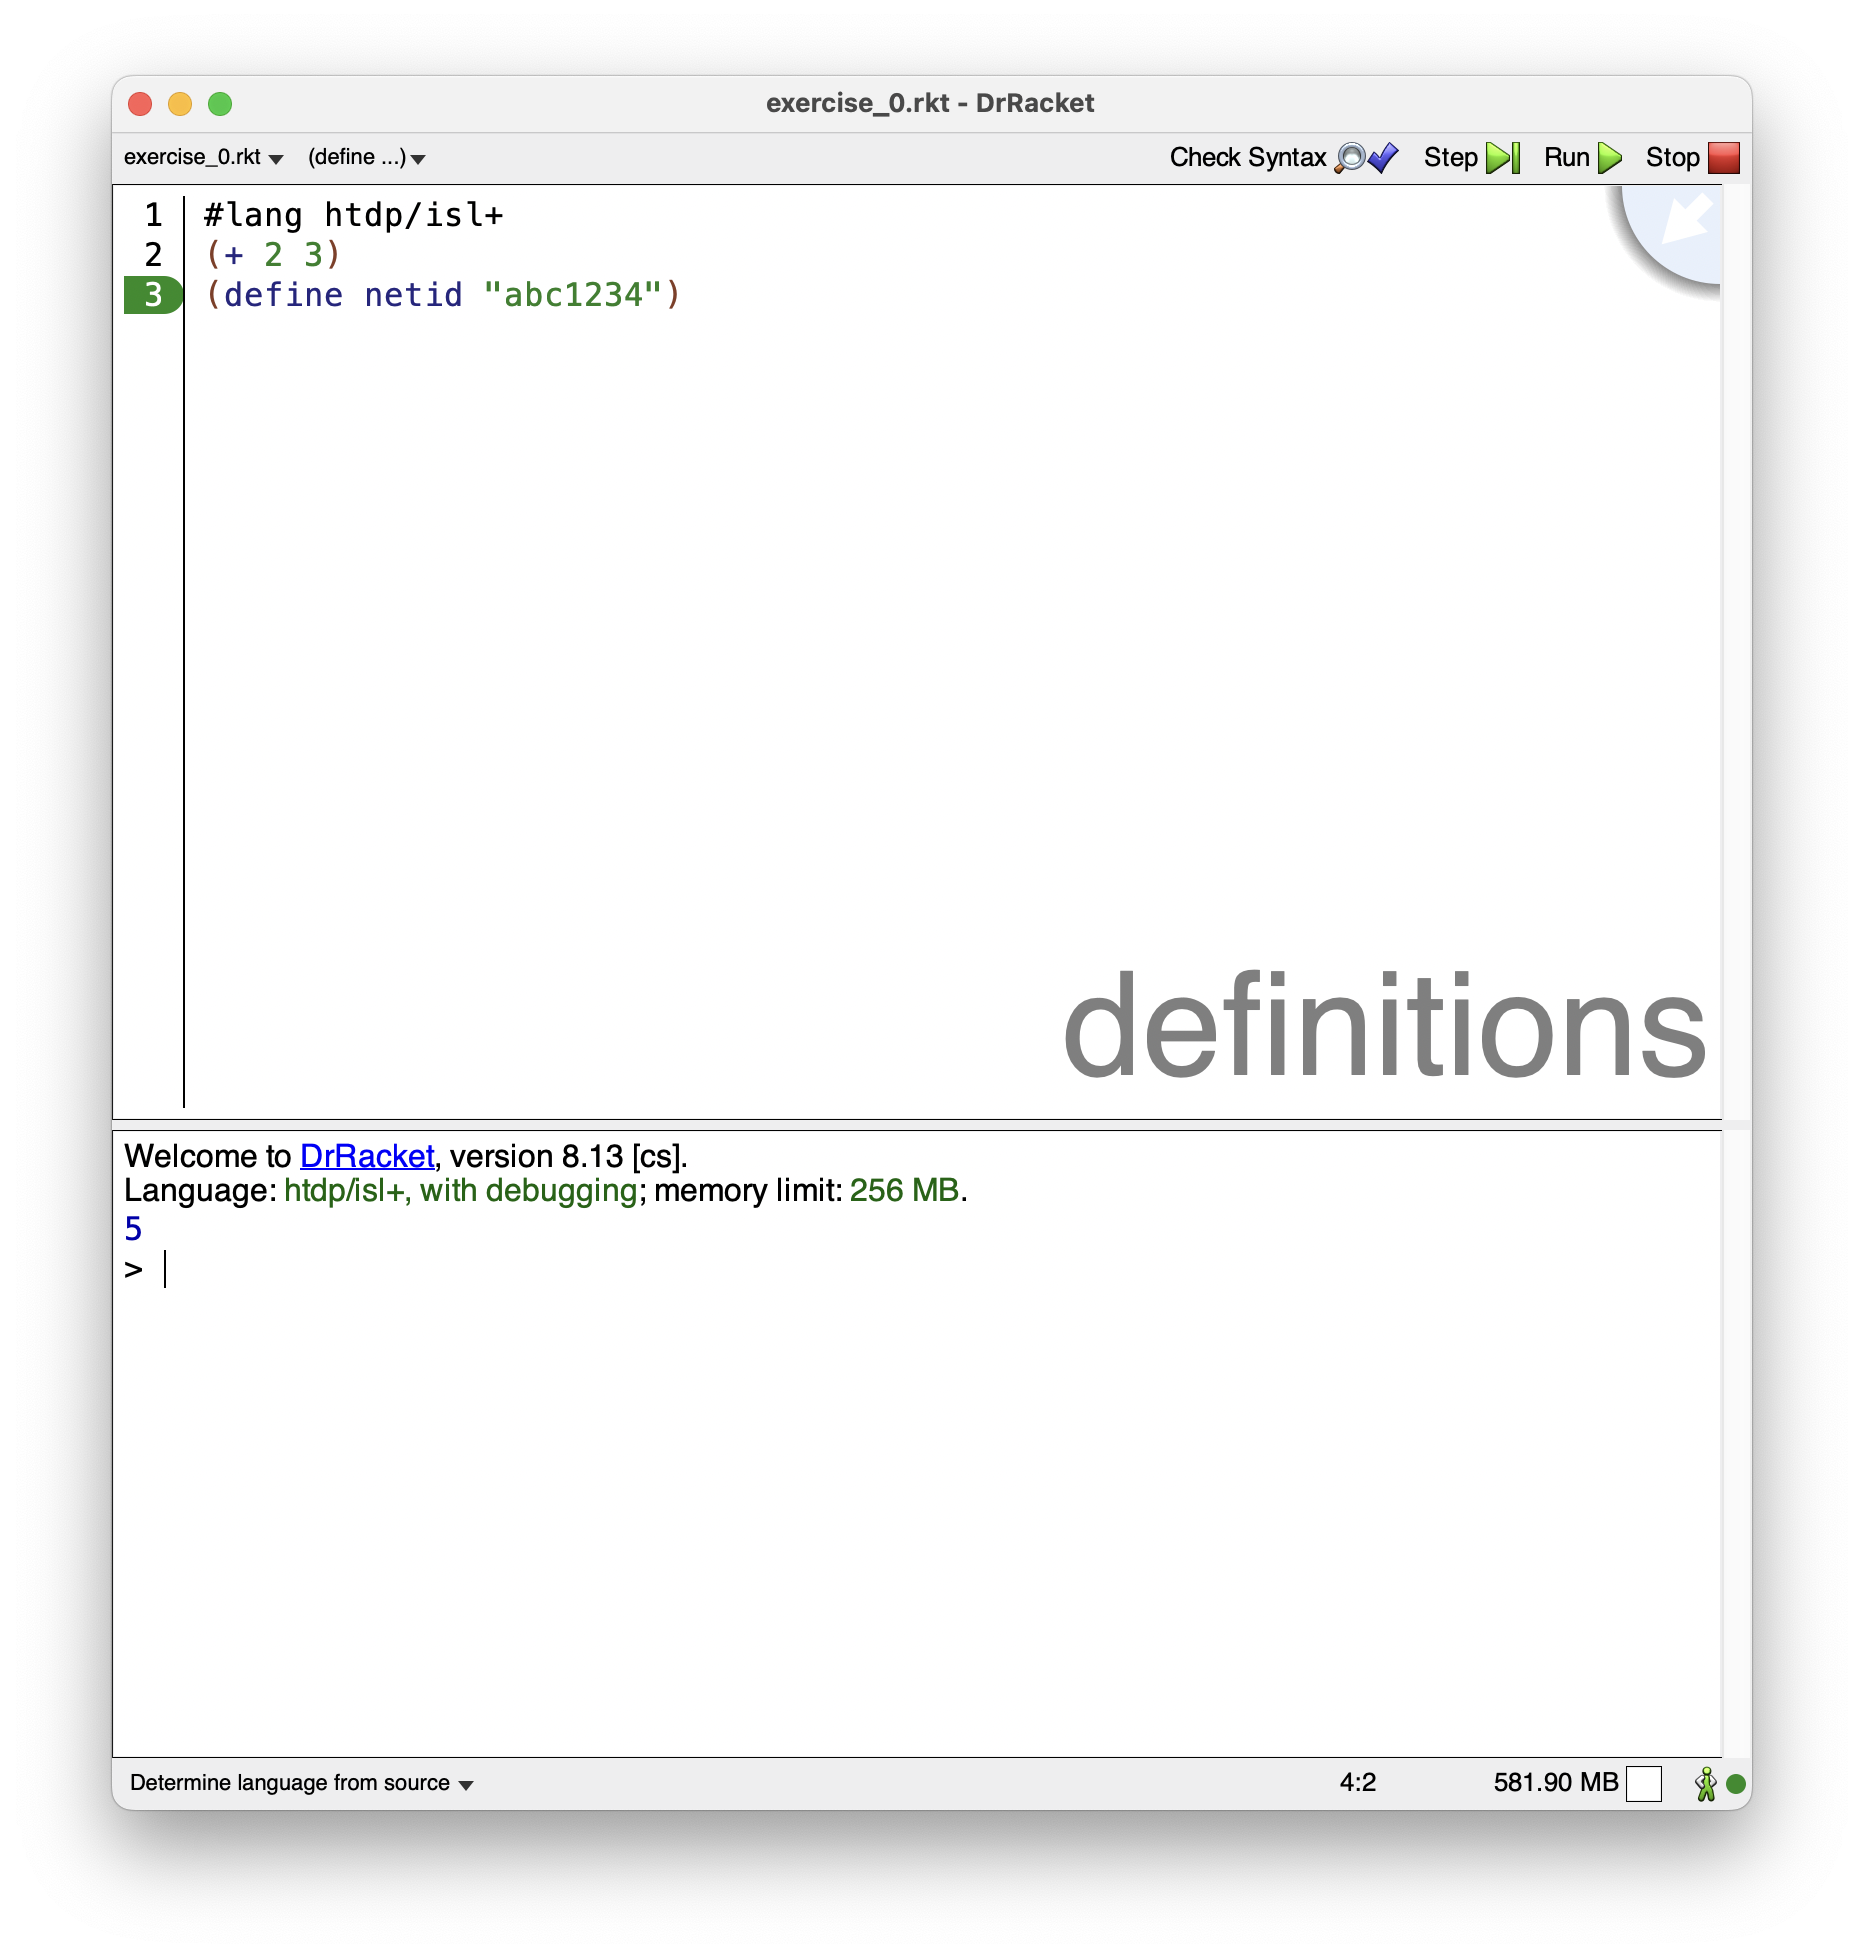
Notice that you won't see your NetID outputted in the _Interactions Window_. That's because you didn't actually ask Racket to do anything with your NetID–you just asked it to remember it. That's okay for now. We just want to have it store the NetID so that when we run your program, we can tell your program apart from your classmate's.
Part 6. Saving your Program
Okay, now we’ve got a program but we haven’t actually saved it on our computer. To do that, go to the File menu and select Save Definitions as.... This will bring up a prompt on your operating system to save your Racket program (just like you save Microsoft Word documents). We highly recommend setting up a single folder somewhere on your computer (i.e. your Desktop) that will store all of your work for this class.
What's the different between "Save" and "Save as..."?
Generally, Save as... is short hand for: "Save this thing as a new file with a name and location that I specify." Save on the other hand usually implies: "This file already exists so just overwrite the earlier copy with the same name and location."I like commonsense file names, so go ahead and name your file exercise_0.rkt. Once you hit save, you should be able to go to that folder on your computer and see your new document (it will have the .rkt file extension). Congratulations, you’re officially a Racketeer!
Life Advice: Probably best not to use this term outside of our course community as it has some nasty legal implications.
Double Checking your Work
All of the Exercises in this class will be graded via an autograder – a program, written in Racket, that will run your program and test it to see if it meets all the expectations of the assignment. You can see examples of what that looks like here on Piazza!
This means that you must carefully read each assignment description and follow it exactly. If your assignment does not satisfy the requirements in any way (even if you think it’s small and inconsequential) you will receive points off (or in the worst case, not receive any points at all). For this assignment, because the program is so short, there’s only a few things you should check:
- Does your program run without any errors?
- Are you outputting the result of some math calculation?
- Are you storing your actual netid inside the
definestatement?- Important: Racket is case-sensitive (i.e. capitals matter) so make sure that your define statement actually says
(define netid ...)wherenetidhas no spaces and no capitals. - Make sure your netid you enter is actually your netid. The autograder will compare the submitter’s netid to the one in your program.
- Important: Racket is case-sensitive (i.e. capitals matter) so make sure that your define statement actually says
For this assignment, you will upload your exercise_0.rkt file to the assignment on Canvas. DO NOT UPLOAD ANY OTHER FILES.
Pro-Tip 0
Do not MOVE an already open file. If you open a file in DrRacket (or any app) and THEN move the file in your operating system, the app doesn't know the file was moved. It will assume you want to save it in the older folder.Pro-Tip 1
Do not submit a file that you currently have open. Instead, finish your work then close DrRacket. That way, there's no possible way to submit an older file.Pro-Tip 2
Do not have multiple versions of the same file. It just makes it harder for you to keep track of what's what.Pro-Tip 3
Worried you didn't submit the right file? It takes seconds to check! Once you've successfully submitted on Canvas, just download the file you just submitted by clicking on the link Canvas provides. Then open that file in DrRacket. Is it the right one? If so, you're good to go! There are more specific answers in the submissions details section below.Once you’ve submitted your file to Canvas, you’re done! You’ll get feedback via a Canvas comment (usually in under a minute). Note that the page won’t automatically refresh. If you have the Canvas app on your phone / tablet, you should receive a notification when your feedback is ready.