Chromebooks are great little computers but like a tablet, often have big limitations on what software can be run on them. If you plan on taking computer science classes in the future, it is highly recommended you invest in a laptop that runs either Windows 10/11 or macOS. It is possible to install Racket/DrRacket on Chromebooks from the last few years but because there are so many different vendors and types of Chromebooks, we can’t guarantee it will work on yours. Try the steps below and if you get stuck, contact the instructor.
Setting up DrRacket
First, make sure to startup your Chromebook and navigate to the Settings app.
Next, scroll in teh left hand column until you see the Advanced menu. Expand it and click Developers.
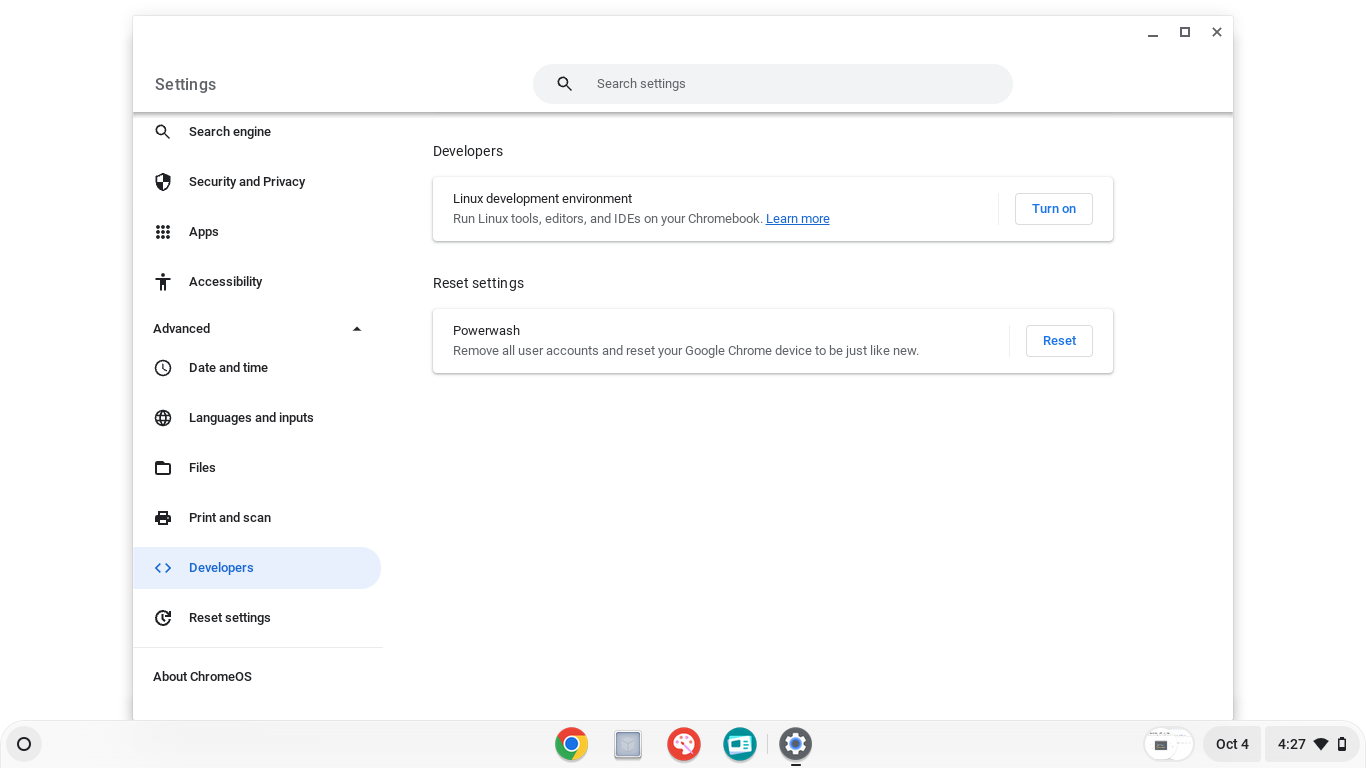
On that screen, you see a section that says Linux development environment and a button that says Turn On. Click the button!
Important: If your Chromebook instead says something along the lines of “you cannot install the Linux development environment on this Chromebook”, you won’t be able to follow the rest of the instructions. See the end of this page for other options and go see the instructor.
Once you click the button, you’ll be greeted with a new window:
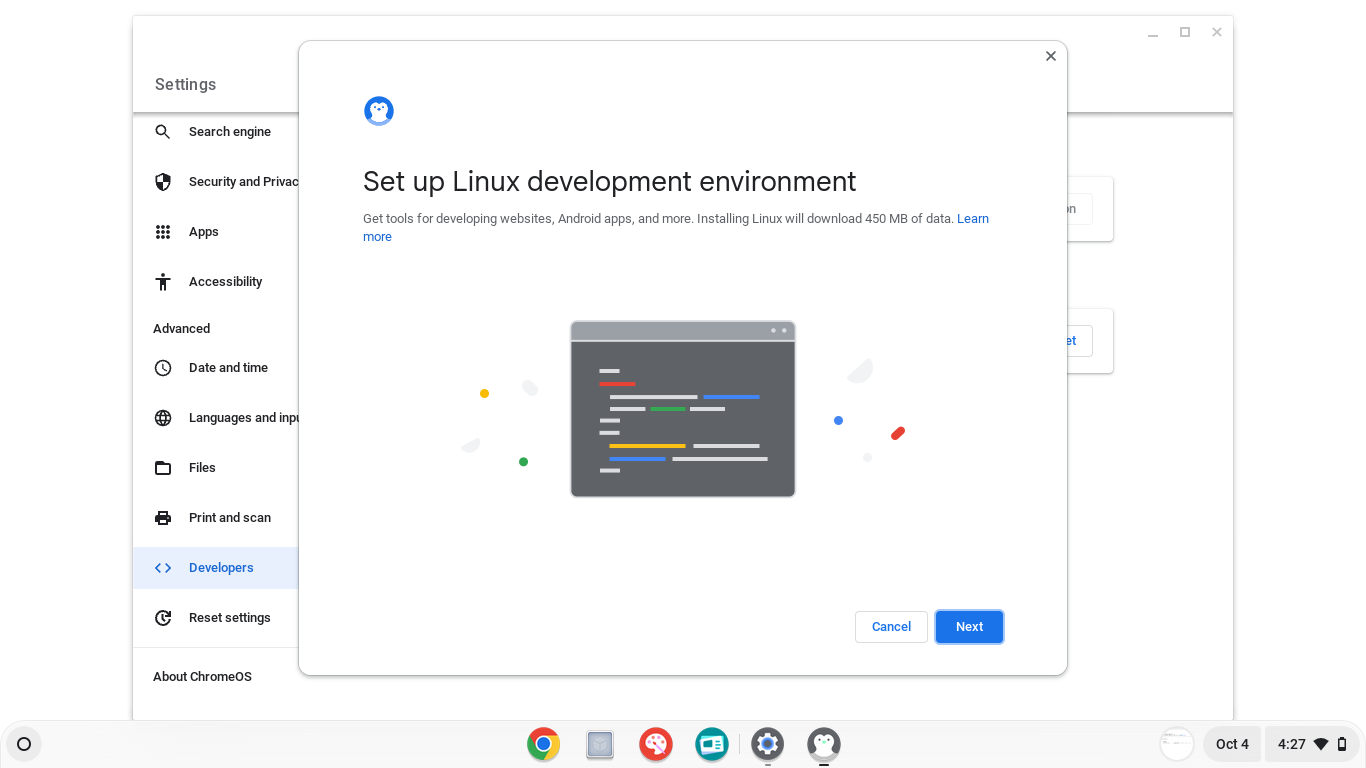
Click the Next button. You’ll be greeted with a screen like the below:
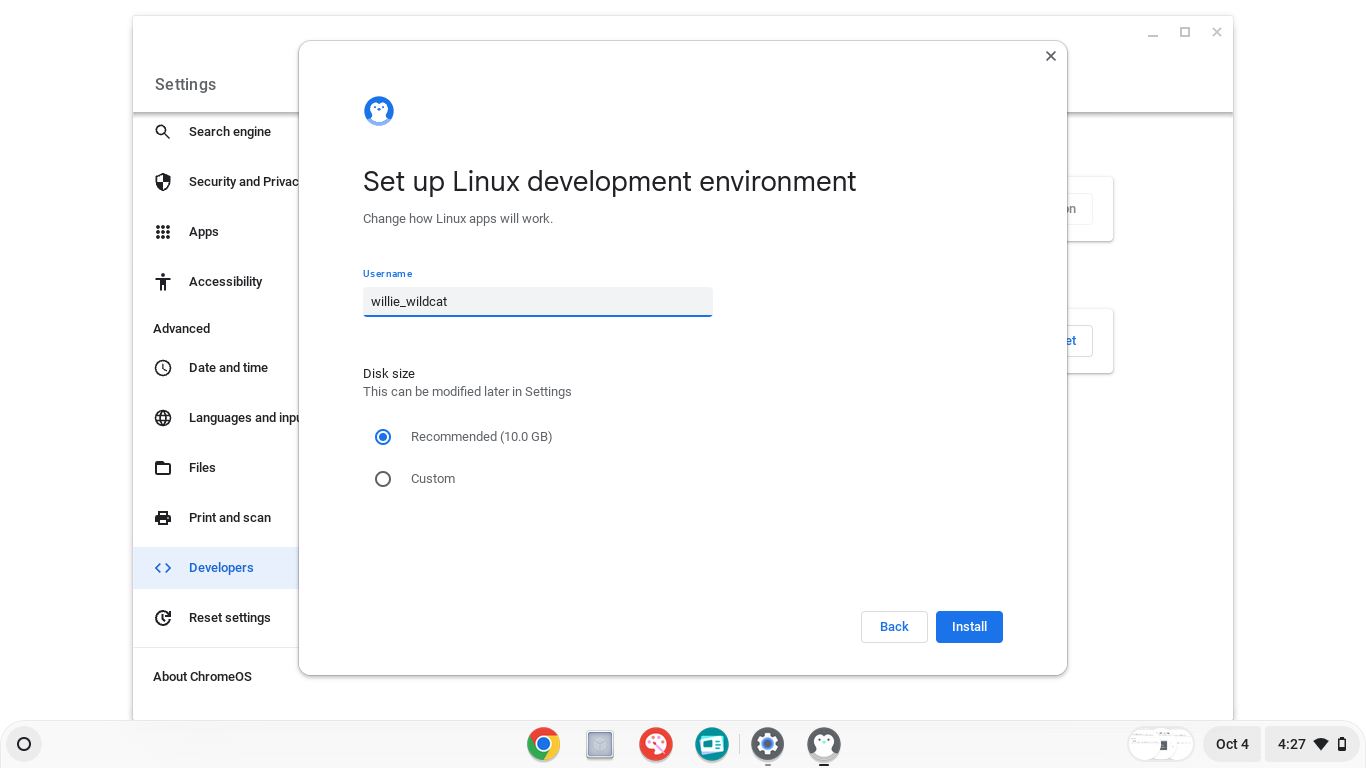
For the first one, you can enter whatever you’d like, this will be your Linux Username. The second option asks for how much space you want to dedicate to this portion of your computer. The recommended is 10GB, but the absolute lowest we recommend going is 3GB. It’s possible you may have to remove some stuff from your device if you don’t have enough space.
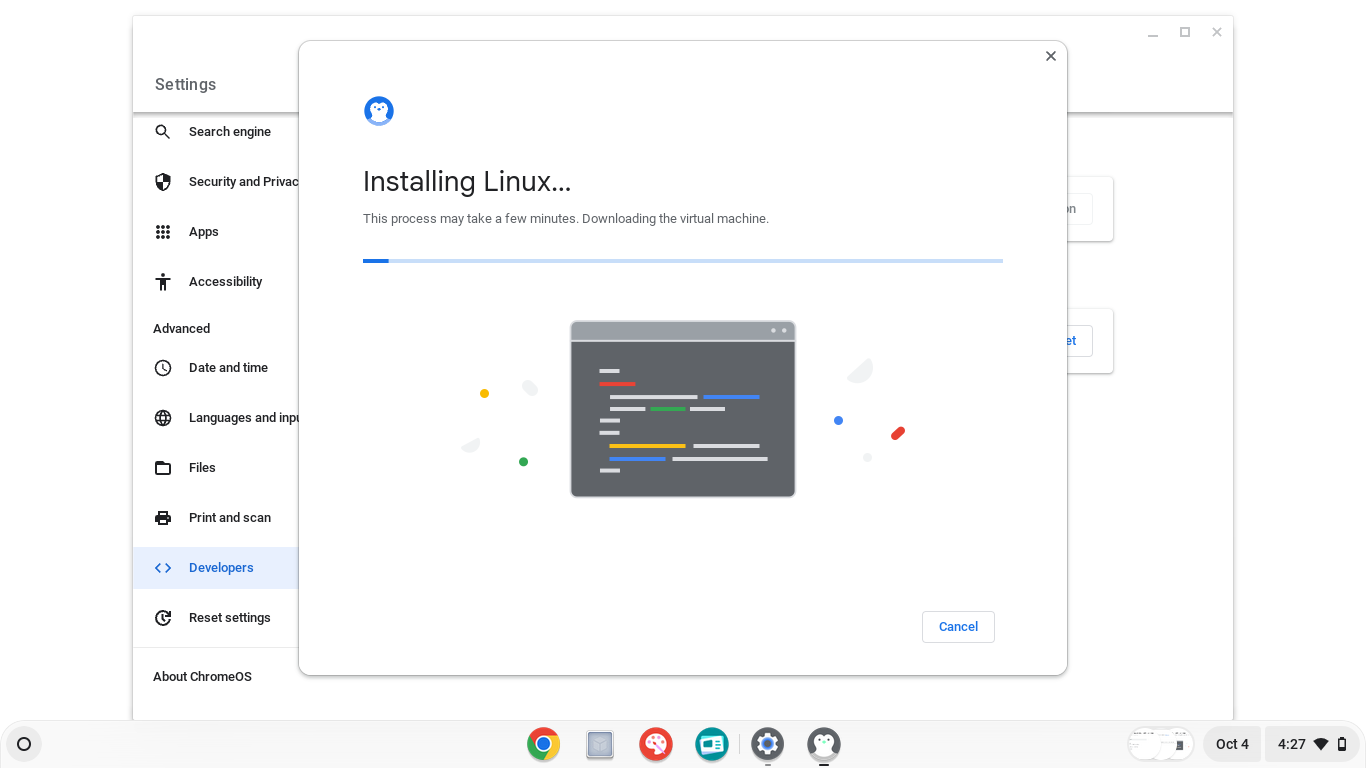
Once you’ve selected your options, hit the Install button and you’ll get a progress page:
Once it’s done, you’ll see a Terminal Window like the below pop-up:
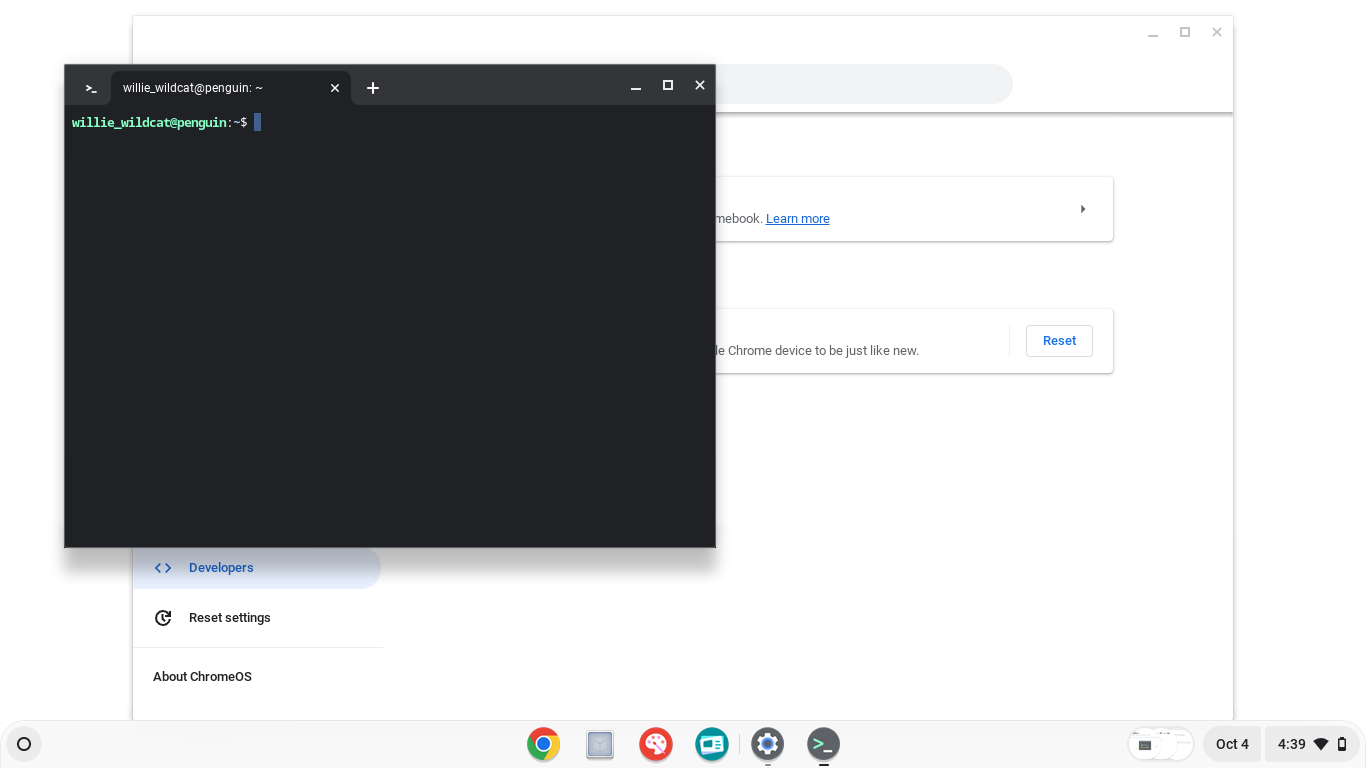
Now it’s time to get fancy and issue some terminal commands. Copy and paste the following commands, one at a time, into that terminal window (depending on your Chromebook, you may have to type them…make sure to type them exactly). After you paste each one, hit enter, and wait for the command to complete (you’ll know it’s done when you get back to a blank line starting with your username in green).
sudo apt-get updatesudo apt-get install racket-common=8.16+dfsg1-3sudo apt-get install racket=8.16+dfsg1-3
After that last one, Racket is successfully installed! If you go to your App Shelf, there will be a new folder called Linux applications and in that folder will be DrRacket. Click on it (and pin it to your dock) to launch.
Some weird things about working with Chromebooks
- Your files in “Linux” are in a different place than your regular Chromebook files. In the Files window, you’ll now always see a location labeled
Linux Files. If you want DrRacket to be able to access a file, you must move it from your Google Drive folder into thisLinux Filesfolder. - For some reason, ChromeOS doesn’t have a function to extract ZIP files. In week 2 of our class, you’ll start getting ZIP files (packaged folders you download). On a Chromebook, after downloading the ZIP file double click on it and it will open like a regular folder (but with a message that says
Read-onlyat the top of the screen). Drag the folder you see inside the zip file onto yourLinux filesfolder. That will both make them available in DrRacket and will also extract the relevant files. - You won’t be able to double click on
RKTfiles to open them in DrRacket. Instead, you’ll need to first open DrRacket then select theFilemenu, thenOpen, and then select the RKT file from yourLinux Files.
What do I do if this doesn’t work?
If you run into an issue while following these steps, come to office hours!
If your Chromebook says it can’t enable Linux, then you’ve got several other options:
- The Library Loaner program has laptops you can check out temporarily.
- All Computer Labs on Campus should have Racket pre-installed.
- McCormick Physical Computer Labs have Racket pre-installed.
- McCormick Virtual Computer Lab. This is usable on any device with a web browser like an iPad or Chromebook. Login here and then search for “Racket” and click Launch. It’ll start a whole Windows computer inside your browser that you can use with DrRacket. Keep in mind you’ll have to redownload any files you downloaded on your Chromebook inside the Windows computer.
- The CS Department has a very limited supply of laptop loaners. If none of the above 4 work, contact the Instructor.